Reviews and guides for popular DJ software and useful apps.

The Best Tools for Creating Remixes in 2024

Remixing has become an essential skill for DJs and music producers. Whether you’re adding your unique spin to a classic track or creating a fresh dancefloor anthem, having the right tools is crucial for achieving professional results. In 2024, the technology available for making remixes has never been better, with powerful software, hardware, and plugins that can transform your ideas into reality.

If you’re ready to take your remix game to the next level, check out mp4remix.com for more tips, tools, and resources to elevate your music production skills.


1. Best DAWs (Digital Audio Workstations) for Remixing

A reliable DAW is the backbone of any remixing workflow. These platforms allow you to edit, arrange, and manipulate audio to create something entirely new.

  • Ableton Live 11
    • Known as the industry standard for DJs and producers, Ableton Live offers unmatched flexibility for remixing.
    • Features like Warp Mode allow you to easily time-stretch and sync tracks, while the session view is perfect for experimenting with loops and samples.
    • Includes built-in tools like Drum Rack and Simpler for adding beats and effects.
  • FL Studio 21
    • Ideal for beginners and experienced producers alike, FL Studio’s intuitive interface makes it easy to remix tracks.
    • The updated Audio Editor and Time-Stretching Tools in 2024 enhance its capabilities for creating unique remixes.
    • Packed with plugins like Harmor and Gross Beat for manipulating audio creatively.
  • Logic Pro
    • A favorite among Mac users, Logic Pro offers advanced tools for remixing, including Flex Time for precise audio editing and a wide range of built-in instruments.
    • Its Live Loops feature mimics Ableton’s session view, making it more DJ-friendly than ever.

2. Top Hardware for Remixing

While software is essential, the right hardware can make your remixing process more intuitive and hands-on.

  • Akai Professional MPC One+
    • A standalone music production device with powerful sampling capabilities, perfect for remixing on the go.
    • Features touch-sensitive pads, MIDI compatibility, and advanced sample manipulation tools.
  • Pioneer DJ DDJ-FLX10
    • This controller bridges the gap between DJing and remixing by offering Stem Control that allows you to isolate vocals, drums, and basslines from tracks in real time.
    • Integrates seamlessly with Rekordbox and Serato, giving you more control over your remixes during live performances.
  • Native Instruments Maschine+
    • A powerful groove production tool that combines hardware and software.
    • Offers advanced sequencing, sampling, and sound design capabilities for creating remix-worthy beats and loops.

3. Must-Have Plugins for Remixing in 2024

Plugins can expand your creative possibilities, helping you reshape and enhance your tracks in unique ways.

  • Serato Sample
    • A powerful sampler plugin that makes chopping, looping, and key-shifting audio incredibly easy.
    • Perfect for extracting specific elements like vocals or melodies from tracks for remixing.
  • iZotope Stutter Edit 2
    • Designed for adding glitchy effects and intricate transitions, this plugin can give your remix a polished and modern edge.
  • RC-20 Retro Color
    • Adds vintage-style textures and character to your remixes, perfect for creating lo-fi or nostalgic vibes.
  • Output Arcade 2.0
    • Offers an ever-growing library of royalty-free loops and samples that you can manipulate and use in your remixes.

4. Best AI Tools for Remixing

AI-powered tools are revolutionizing the way DJs and producers create remixes, making tasks like stem separation and audio enhancement faster and easier.

  • Stem Creator by Audionamix
    • Automatically isolates vocals, drums, bass, and other elements from any track, giving you complete freedom to remix.
  • Endlesss Studio
    • A collaborative music platform that uses AI to help you create loops and build tracks in real time, perfect for remixing with other artists.
  • LANDR Mastering
    • After completing your remix, use this AI-powered mastering tool to ensure your track sounds polished and professional.

5. Sample Libraries and Loops

High-quality samples and loops are the foundation of many great remixes. Here are some go-to resources for 2024:

  • Splice
    • A subscription-based platform offering millions of royalty-free samples, including vocal chops, drum loops, and synth patches.
    • Perfect for finding fresh sounds to incorporate into your remix.
  • Loopmasters
    • A vast library of genre-specific loops and samples, including exclusive packs from renowned producers.
  • Noiiz
    • Offers both a sample library and a cloud-based plugin for instant drag-and-drop functionality.

Tips for Choosing the Right Tools

With so many options available, how do you know which tools are right for you? Here are some things to consider:

  • Budget: Start with affordable or free tools if you’re a beginner. Many DAWs and plugins offer free trials.
  • Compatibility: Ensure your hardware and software are compatible with your existing setup.
  • Workflow: Choose tools that fit your style of remixing, whether that’s live loop-based performances or studio-focused production.

Final Thoughts

The right tools can make all the difference in creating standout remixes that captivate listeners. From powerful DAWs like Ableton Live to innovative AI tools and sample libraries, 2024 offers a wealth of options for DJs and producers.

Ready to dive into remixing? Visit mp4remix.com for more expert tips, tutorials, and gear recommendations to help you level up your remixing skills.

Start exploring these tools today and take your remixes to the next level!

Ozone 9 by iZotope - The Ultimate Tool for Mixing

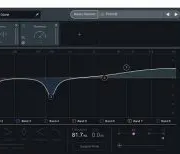
When it comes to mixing and mastering music, the right tools can make all the difference. One of the most powerful and comprehensive plugins on the market today is Ozone 9 by iZotope. At $249 USD, this plugin offers everything you need to achieve professional-quality masters right from your own home studio. Whether you’re a seasoned producer or just starting to explore the world of mastering, Ozone 9 is an invaluable tool for perfecting your sound.

What is Ozone 9?

Ozone 9 is a complete suite for mixing and mastering music, offering a range of tools designed to take your tracks from good to great. Whether you’re polishing a mix for release or mastering a track to industry standards, Ozone 9 provides everything you need in one package. Inside, you’ll find an EQ, Exciter, Imager, Post EQ, Maximizer, Multiband Compressor, and a Limiter—all the essential tools for fine-tuning your sound.

Key Features of Ozone 9

  1. Master Assistant:
    One of the standout features of Ozone 9 is its Master Assistant. This innovative tool allows you to compare your track to a reference track at the click of a button. It takes just a minute or two to process, and then the plugin suggests settings to help you get as close as possible to the sound of your reference track. This feature is especially helpful for producers who want to ensure their mixes are competitive with the best in the industry.
  2. Comprehensive Toolset:
    Ozone 9 offers a range of inbuilt tools for shaping and enhancing your sound:
    • EQ: Fine-tune the frequency balance of your track.
    • Exciter: Add harmonic content to enhance warmth and clarity.
    • Imager: Widen the stereo image of your track.
    • Post EQ: Further adjust the tonal balance after other processing.
    • Maximizer: Push your track to the desired loudness without distorting the sound.
    • Multiband Compressor: Control dynamics across multiple frequency bands for greater precision.
    • Limiter: Ensure your track peaks at just the right level.
    These features work together to create a polished, professional-sounding master.
  3. Beautiful Interface:
    Ozone 9’s interface is sleek, modern, and easy to navigate. The layout is intuitive, making it easy to move between different modules and tweak settings on the fly. This visual design ensures you can work quickly without getting lost in complex menus or controls.
  4. CPU Usage:
    One downside to Ozone 9 is that it can be quite CPU-intensive, especially when running multiple instances of the plugin during real-time production. However, this isn’t a huge issue when used during the final stages of mixing, where you only need to process your master. For producers who are working with limited system resources, it may be a good idea to apply Ozone 9 during the final mixdown.
  5. Learn to Master Your Own Tracks:
    While many producers still rely on professional mastering engineers, Ozone 9 makes it possible to master your own tracks with a high level of quality. The plugin helps you achieve industry-standard results without the added cost of sending tracks off to a professional studio. Although mastering is a nuanced skill, Ozone 9 provides all the tools you need to get started, making it an exciting learning experience for producers who want to take full control of their music.

Why Choose Ozone 9?

If you’re serious about mastering your music, Ozone 9 is an essential addition to your toolkit. Here are some of the top reasons to invest in this plugin:

  • All-in-One Solution: Ozone 9 combines multiple essential mastering tools into one package, making it easier to achieve professional-quality results with less hassle.
  • Master Assistant Feature: This tool helps take the guesswork out of mastering by comparing your track to a reference track and offering preset settings to match.
  • User-Friendly Interface: Despite its power, Ozone 9 is intuitive and easy to use, even for those who are not professional mastering engineers.
  • Cost-Effective: At $249, Ozone 9 pays for itself over time by saving you the cost of professional mastering services.

Conclusion

Ozone 9 by iZotope is a comprehensive and powerful plugin that can help transform your tracks into polished, professional-sounding masters. Whether you’re a DJ, producer, or hobbyist, mastering your own tracks with Ozone 9 is a rewarding experience that saves both time and money.

You can learn more about Ozone 9 and explore additional tools for DJs and producers at MP4 Remix and check out the Top 10 Essential Plugin Types for DJs for even more tips on enhancing your music production skills.

Ozone 9 is a game-changer for any producer looking to master their own tracks and create the best-sounding music possible. With its comprehensive features, beautiful interface, and powerful Master Assistant, it’s easy to see why it’s a must-have tool in the modern music production world.

Little Alter Boy by Soundtoys - Transform Vocals and Instruments

When it comes to creative pitch manipulation, Little Alter Boy by Soundtoys is an invaluable plugin for producers looking to transform sounds, especially vocals. This powerful pitch-shifting tool goes beyond simple transposing, giving you options to change vocal character, adjust formants, and even add tube saturation for warmth. It’s versatile and works seamlessly on vocals, synths, guitars, and more, allowing you to explore new tonal possibilities with ease.


What is Little Alter Boy?

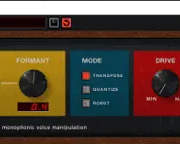
Little Alter Boy is a pitch-shifting and formant-shaping plugin that allows you to change the pitch of a sound while retaining its natural tonal quality. With just a few controls, it’s incredibly easy to get started. Little Alter Boy’s unique features make it ideal for everything from subtle pitch adjustments to dramatic vocal transformations, where you can add robotic textures or shift gender tones for a unique effect.


Key Features of Little Alter Boy

Little Alter Boy’s simple interface and powerful features make it an attractive choice for all kinds of sound manipulation:

  1. Pitch Control: Adjust the pitch of your audio up or down to create harmonies, octaves, or completely alter a vocal or instrumental line.
  2. Formant Control: The formant knob lets you modify the tonal quality without affecting pitch. This is perfect for shifting vocal character, allowing you to make a voice sound deeper, higher, or more robotic.
  3. Tube Saturation: Little Alter Boy includes a tube saturation knob that adds warmth and analog character to your sound. This saturation effect can be used subtly or heavily to give sounds a more organic, “vintage” quality.
  4. Mix (Dry/Wet) Control: The dry/wet knob lets you blend the effect with the original sound, giving you more control over the intensity of the pitch shift and other adjustments.
  5. MIDI Control: Little Alter Boy allows you to control pitch through MIDI input, turning it into a powerful live performance tool where you can play pitch shifts like an instrument.

How to Use Little Alter Boy in Your Production

Little Alter Boy can be applied in many ways, from subtle enhancements to bold transformations. Here are some practical uses:

  • Vocal Pitch Shifting: Use Little Alter Boy to adjust vocal pitch, creating harmonies or even mimicking multiple voices from a single vocal take. This is especially useful for adding depth to background vocals.
  • Gender-Bending Formant Shifts: Experiment with the formant knob to alter the vocal character. This can make a voice sound more masculine or feminine, add a robotic tone, or create alien-like textures.
  • Adding Warmth with Tube Saturation: Little Alter Boy’s tube saturation can be applied to any sound to add warmth and richness. Try it on vocals, synths, and guitars for a warm, analog feel.
  • Layering Synths with Pitch Shifting: Use Little Alter Boy on synths to pitch-shift layers, adding unique textures that stand out in a mix. This is perfect for creating leads that pop or atmospheric effects that feel immersive.
  • Live Performance with MIDI: If you’re performing live, Little Alter Boy’s MIDI control allows you to use your keyboard to “play” pitch shifts, making it a great tool for on-the-fly effects.

Why Little Alter Boy is Ideal for Vocal Manipulation

Little Alter Boy is one of the best plugins for vocal transformation. With its pitch and formant controls, you can create unique vocal effects that stand out in any genre. It’s popular among producers in EDM, hip-hop, pop, and experimental music for its ability to reshape vocals into entirely new sounds. Little Alter Boy’s saturation adds warmth to digital recordings, providing a fuller, more analog sound.


A Few Drawbacks

While Little Alter Boy is powerful, it does have one limitation worth noting:

  • iLok Activation Required: Little Alter Boy requires an iLok license, which can make installation a bit more involved. However, once activated, it performs reliably.

For those unfamiliar with iLok, see our Guide to Setting Up iLok for Plugins to simplify the process.


Favorite Little Alter Boy Features

Here’s what makes Little Alter Boy a standout tool for sound design and vocal manipulation:

  • Tube Saturation: Adds warmth and analog character.
  • Formant Control: Changes vocal character without affecting pitch.
  • Dry/Wet Knob: Allows for easy blending with the original sound.

Final Thoughts

Little Alter Boy by Soundtoys is an exceptional tool for creative sound manipulation, allowing you to completely transform vocals and instruments with ease. Its pitch and formant control, combined with tube saturation, make it a versatile addition to any producer’s toolkit. Whether you’re looking to subtly enhance vocals or create wild, experimental sounds, Little Alter Boy offers the flexibility and quality to deliver outstanding results.

For a free trial or to dive deeper into its features, visit the official Soundtoys website. For anyone serious about vocal production and sound design, Little Alter Boy is a must-have.

OTT by Xfer - The Ultimate Free Multiband Compressor

In electronic music production, dynamic control is key to achieving a polished, professional mix. OTT by Xfer is a powerful and free multiband compressor that has become an industry standard for EDM and other electronic genres. Its ability to add punch, clarity, and depth to any sound has made it a must-have for producers everywhere.


What is OTT?

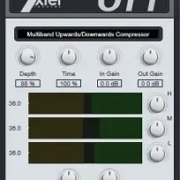
OTT, short for Over The Top, is a multiband compressor that applies compression across three frequency bands—lows, mids, and highs. This type of compression, also known as upward-downward compression, enhances both quiet and loud elements in each frequency range, bringing out detail and fullness. Despite its powerful processing, OTT is easy to use, with a clean and simple interface that allows you to adjust the compression with a few intuitive controls.


Key Features of OTT

OTT’s straightforward controls make it easy to get impressive results without a steep learning curve. Here’s what makes OTT so special:

  1. Three Frequency Bands: OTT lets you control the low, mid, and high-frequency bands separately, giving you precise control over how each range is compressed. This allows you to add presence to the highs, warmth to the lows, or keep the mids punchy.
  2. Dry/Wet Control: The dry/wet knobs let you blend the compressed signal with the original sound, allowing you to apply subtle or aggressive compression as needed. This versatility makes OTT suitable for both mixing and sound design.
  3. Intuitive Interface: OTT’s interface is minimalistic and easy to navigate, with clear visual feedback. Even if you’re new to multiband compression, OTT’s interface makes it simple to achieve professional results.
  4. Depth Control: This parameter allows you to increase or decrease the intensity of the effect, giving you more flexibility over how OTT shapes your sound.

Practical Uses for OTT in Production

OTT’s multiband compression can add a distinct character to sounds, making it popular for many elements in electronic music:

  • Adding Punch to Drums: Applying OTT to drums can bring out attack and body, making them punch through the mix. Adjust the dry/wet knob to add just enough compression without overwhelming the sound.
  • Brightening Synths: Use OTT on leads and synths to enhance high-end details and add a polished, bright quality. This is especially effective for supersaws, leads, and pads.
  • Thickening Basslines: OTT can add warmth and fullness to basslines by enhancing the low end while maintaining clarity in the mids and highs. This makes bass elements feel powerful without muddying the mix.
  • Bringing Vocals to Life: OTT’s compression can bring out subtle nuances in vocals, making them stand out. The multiband approach helps vocals sit better in the mix by enhancing clarity and presence.

Tip: If you’re new to multiband compression, start with gentle settings and adjust the dry/wet knob to find the right balance. Experimenting with OTT’s controls can lead to unique results!


Why OTT is Essential for EDM Producers

OTT’s powerful yet simple design makes it ideal for modern electronic production. Whether you’re looking to add punch to drums, thicken synths, or bring clarity to vocals, OTT delivers professional-quality results with ease. Its popularity among EDM producers is no surprise, as it adds the intense, dynamic punch that defines many electronic genres.

For beginners, OTT provides an accessible introduction to multiband compression. And for experienced producers, it offers a quick and effective way to shape sounds with minimal effort.

Explore More: Interested in learning more about dynamic control? Check out our article on Best Free Plugins for DJs to find additional must-have tools.


Why Producers Love OTT

OTT has earned its reputation as a staple in electronic production, thanks to its unique sound and ease of use. Here’s why it’s a favorite among producers:

  • It Just Sounds Good: OTT can instantly improve any sound, from drums to vocals, making it a highly versatile tool.
  • Dry/Wet Knob for Blending: This control allows you to blend OTT’s powerful effect with your original signal, ensuring flexibility and subtlety.
  • Simple Interface: The intuitive design and clear visual feedback make it accessible to users of all levels, from beginners to professionals.

Final Thoughts

OTT by Xfer has become an essential tool for producers seeking powerful, accessible multiband compression. Whether you’re fine-tuning drum transients, enhancing synths, or giving vocals more presence, OTT’s flexibility and sound quality make it invaluable in any production environment.

Free and straightforward, OTT provides the punch, clarity, and character that today’s electronic music demands. For those looking to elevate their mixes, OTT is a game-changer that delivers results that sound “over the top”—in the best possible way.

4o

Ozone Imager 2 by iZotope - Powerful Stereo Imaging

When it comes to creating professional-quality mixes, stereo imaging is essential. Ozone Imager 2 by iZotope is a free, straightforward plugin that gives you precise control over your track’s stereo width, helping you achieve a clean and spacious mix. Despite its simplicity, this plugin is incredibly powerful, making it a go-to choice for producers who want to shape their sound’s stereo field with ease.


What is Ozone Imager 2?

Ozone Imager 2 is a stereo imaging plugin designed to add width to your tracks or focus certain elements in mono. With only two main controls, Width and Stereoize, Ozone Imager is incredibly easy to use. Yet, it provides detailed visual feedback on your stereo width and panning, making it an ideal choice for both beginners and experienced producers.

If you’re new to stereo width and imaging, read our introduction to Understanding Stereo Width in Music Production to get a solid foundation.


Key Features of Ozone Imager 2

Ozone Imager 2 might be free, but it doesn’t skimp on quality. Here are its main features:

  1. Width Control: The Width fader is the plugin’s main control. Sliding it up increases the width of your sound, adding depth to elements like pads and vocals. Lowering the width narrows the sound, which can help focus basses, kicks, and other low-end elements.
  2. Stereoize: This feature adds natural-sounding stereo width without causing phasing issues, making it ideal for adding width to sounds that were originally recorded in mono.
  3. Real-Time Visual Feedback: Ozone Imager 2 offers a clear, visual representation of your stereo field, helping you to see where sounds are positioned. This feedback is especially helpful during mixing, allowing you to easily spot clashing frequencies and adjust as needed.

Practical Uses for Ozone Imager 2

Ozone Imager 2’s simplicity makes it incredibly versatile in the studio. Here are a few ways you can use it to improve your mix:

  • Widening Pads and Synths: Use the Width fader to expand the stereo field of background elements like pads and synths, creating a lush and immersive soundscape.
  • Narrowing Bass and Kick: For a clean mix, it’s best to keep bass-heavy sounds in mono. Use Ozone Imager 2 to narrow the stereo width on your kick and bass for a more focused low end.
  • Adding Width to Vocals: The Stereoize feature can add a subtle sense of space to vocals, making them sound wider and fuller without any phasing issues.
  • Identifying Clashing Frequencies: With its real-time visualizer, Ozone Imager 2 is perfect for spotting and fixing clashes in your stereo field. You can quickly identify overlapping frequencies and adjust width to make each element stand out.

Why Ozone Imager 2 is Essential for Mixing

The true strength of Ozone Imager 2 lies in its ability to make stereo imaging simple and accessible. While other stereo imaging plugins might offer advanced controls, Ozone Imager 2 focuses on providing the essentials in a streamlined package. Whether you’re just learning to mix or need a quick, efficient tool for stereo shaping, this plugin delivers.


Benefits of Ozone Imager 2

  • Free and High-Quality: Ozone Imager 2 offers professional-grade stereo imaging tools completely free of charge.
  • Intuitive Visual Feedback: The real-time visualizer helps you understand and manage your stereo field without guesswork.
  • Easy to Use for Beginners: Its simplicity makes it accessible to those who may be new to stereo imaging while still powerful enough for experienced producers.

Explore More Tools: Looking for other free plugins? Check out our Top 10 Free Plugins for DJs for more essential tools to add to your collection.


Final Thoughts

Ozone Imager 2 by iZotope is an invaluable tool for anyone working on a mix. Its easy-to-use controls, visual feedback, and stereo shaping capabilities make it a staple for producers at any level. Whether you’re enhancing your pads or tightening up your low end, this plugin helps you create a spacious, professional-sounding mix with just a few adjustments.

For those looking to enhance their sound design and mixing techniques, Ozone Imager 2 offers a perfect balance of simplicity and power, making it one of the best free stereo imaging plugins on the market.

LFO Tool by Xfer - A Must-Have Plugin

For electronic music producers, having an LFO (Low-Frequency Oscillator) tool is essential. It adds movement, rhythm, and unique dynamics to tracks, making sounds come to life. Among the many options out there, LFO Tool by Xfer is widely regarded as one of the best and most versatile. At $49.95, it’s not free, but its powerful features, ease of use, and unique flexibility make it worth every cent. Here’s an in-depth look at what makes LFO Tool a must-have in any producer’s arsenal.


Why LFO Tool Stands Out

LFO Tool by Xfer isn’t just another modulation plugin. Its intuitive interface and powerful capabilities allow you to shape sounds in ways that are both musical and precise. The plugin excels at creating a range of effects that are fundamental to modern electronic music, including tremolo, auto-pan, trance-gate, side-chain compression simulation, and the famous dubstep-style wobble effect.

Explore More: Interested in other essential plugins? Check out our guide on Top 10 Essential Plugin Types for DJs to expand your toolkit.


Key Features of LFO Tool

LFO Tool’s interface and features are designed for flexibility, allowing producers to create complex effects with ease. Here’s a breakdown of its main sections:

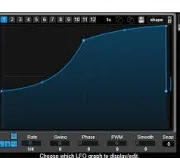
  1. LFO Shapes and Editor: The core of LFO Tool is its customizable LFO shapes. You can draw your own curves or select from a range of preset shapes to create rhythmic patterns that perfectly fit your track.
  2. MIDI Triggering: This feature enables you to trigger the LFO with MIDI notes, providing precise control over when and how the effect is applied.
  3. Built-in Filter Section: The filters in LFO Tool are modeled for high sound quality and offer both high-pass and low-pass filtering. These filters are excellent for sculpting sound and enhancing specific frequencies, making your effects stand out even more.
  4. Modulation Effects: In addition to basic LFO modulation, you can use LFO Tool for side-chain compression emulation. This is especially useful for creating the “pumping” effect that’s popular in electronic genres like house and future bass.

The customization and control that LFO Tool offers allow you to add everything from subtle movement to dramatic, rhythmic effects. It’s perfect for producers who want to dive deep into sound design.


Practical Uses of LFO Tool in Production

Producers across various genres use LFO Tool for a wide range of effects, whether they’re crafting cinematic soundscapes or driving basslines. Here’s how you can make the most of it:

  • Trance-Gate Effect: By using a rhythmic LFO shape, you can create a trance-gate effect that works beautifully on pads and synths. It adds a choppy, pulsing feel that’s popular in trance and other electronic genres.
  • Side-Chain Emulation: LFO Tool’s side-chain simulation is fantastic for adding a pulsing, “ducking” effect to your sound, making it feel more dynamic and rhythmically engaging.
  • Wobble Effects for Dubstep: The plugin is also perfect for creating dubstep-style wobbles on basslines. By automating the LFO rate, you can generate a wobble effect that changes speed in sync with your track.
  • Automated Movement on Supersaws: One of the most exciting uses is applying the LFO Tool to supersaw synths for a rich, evolving sound. You can automate the LFO rate to create interesting modulations, bringing your synths to life.

Tip: For beginners, start with subtle LFO adjustments to get a feel for how each setting changes the sound. Mastering the basics will make it easier to create complex effects down the road!


Why Producers Love LFO Tool

Here’s what makes LFO Tool one of the most popular plugins among electronic music producers:

  • Intuitive Interface: The clean, intuitive layout lets you quickly see and edit LFO shapes, making it easy to create precisely the effect you’re after.
  • Wide Range of Effects: LFO Tool offers more than just basic modulation; it’s a versatile tool for side-chaining, tremolo, gating, and more.
  • Filter Quality: The built-in filters sound smooth and analog-like, which adds warmth and character to your effects.
  • Price: At $49.95, LFO Tool provides a level of quality and versatility that rivals far more expensive plugins.

Final Thoughts

For any producer working in electronic music, LFO Tool by Xfer is an investment worth making. Whether you’re using it to create side-chain effects, rhythmic modulations, or intricate filter sweeps, the plugin’s intuitive interface and deep customization options make it incredibly powerful and versatile.

At an accessible price, it provides quality and features that will enhance any production setup. If you’re serious about sound design, LFO Tool is a must-have, providing an endless array of possibilities to explore.

Krush by Tritik - The Essential Free Bit Crusher

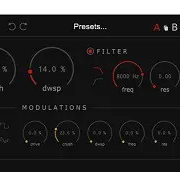
Krush by Tritik is a unique, high-quality bit crusher plugin that’s both versatile and entirely free to download. Known for its warm, analog-inspired sound and intuitive modulation capabilities, Krush has become a favorite for producers who want to add a creative edge to their mixes. Here’s an in-depth look at why Krush deserves a spot in your plugin collection.


Why Krush is a Game-Changer for Producers

Krush is far more than a standard bit crusher. While many bit crushers add harshness and grit, Krush offers a surprisingly warm and organic sound thanks to its analog-modeled filters. With a clean, accessible interface, Krush allows you to blend classic bit-crushing effects with analog warmth and modulation, making it highly adaptable to a wide range of genres.

And just like Camel Crusher, Krush is completely free, making it an invaluable addition for any producer looking to add a bit-crushing effect to their mix without spending a dime.

Download Krush Here: DOWNLOAD HERE


Exploring Krush’s Interface and Key Features

Krush’s interface is intuitive and efficient, with controls that give you complete command over the bit-crushing effect. Here’s a breakdown of its main sections:

  1. Bit Crusher: The bit-crushing section is where the magic happens. You can adjust the bit depth to add digital grit or subtle lo-fi warmth to any sound.
  2. Filter: Krush’s filter section is modeled on analog filters, giving the plugin a smooth, organic tone that you can dial in to control frequency response and reduce harshness.
  3. Modulation: This section lets you modulate different aspects of the bit crusher, filter, and other parameters. You can choose from four different waveforms and sync the modulation to your project’s tempo or run it freeform.
  4. Dry/Wet Mix Fader: The dry/wet fader lets you blend the effect with the original signal, giving you precise control over how the effect sits in your mix.

The modulation capabilities in Krush are a standout feature, providing flexibility that’s rare in a free plugin. You can create unique effects by modulating any of the parameters, allowing the bit crusher to fit naturally into your mix without overpowering it.

Pro Tip: Experiment with different waveforms in the modulation section to add dynamic variation to your sound. You’ll be surprised at the textures you can achieve by syncing modulation to your track’s tempo!


Warm, Analog Sounding Bit Crushing

One of the main reasons producers love Krush is its warm, analog sound. The filter section, modeled on classic analog filters, gives the bit crusher a smooth quality that makes it suitable for both heavy and subtle effects. Whether you’re looking to add extreme digital crunch to your drums or a gentle lo-fi vibe to a synth, Krush delivers a polished result.


A/B Comparison and Easy Blending

Krush also offers an A/B comparison feature, allowing you to quickly compare two different settings and blend to taste using the dry/wet fader. This feature is especially useful for producers who like to experiment with different sounds and fine-tune their effects.

Related Article: To explore more unique and free plugins, check out our post on Top 10 Essential Plugin Types for DJs.


Why Krush Stands Out Among Free Plugins

Krush is a free plugin with premium-quality features, making it highly recommended for any producer’s toolkit. Here’s what sets it apart:

  • Free and High Quality: Rarely do free plugins come with this level of sound quality and flexibility.
  • Analog Modeled Filters: The filter section gives a warm, natural tone that contrasts with the digital harshness of bit-crushing.
  • Modulation Capabilities: The modulation section opens up creative possibilities for everything from subtle movement to wild, syncopated textures.
  • Simple Interface with A/B Comparison: Krush’s clean design and A/B comparison make it easy to use and customize quickly.

Final Thoughts

Krush by Tritik is more than just another bit crusher. With its unique combination of analog warmth, versatile modulation, and powerful bit-crushing, Krush is an invaluable tool for adding character and depth to your tracks. And because it’s free, it’s an excellent way for producers of any skill level to explore creative sound design without a financial commitment.

Whether you’re aiming for subtle lo-fi vibes or aggressive digital distortion, Krush offers a level of quality that rivals many paid plugins. For any DJ or producer, Krush is a must-have, whether you’re just getting started or looking to expand your sonic possibilities.

Camel Crusher by Camel Audio: The Essential Free Distortion Plugin

If you’re on the hunt for a high-quality distortion plugin that’s versatile, powerful, and doesn’t cost a dime, look no further than Camel Crusher by Camel Audio. This free plugin has built a reputation as a must-have tool for music producers of all genres, providing an easy way to add grit, warmth, and punch to any track. Here’s an in-depth look at Camel Crusher, its features, and why it deserves a place in your plugin arsenal.


Why Camel Crusher is a Must-Have for Producers

Camel Crusher is known for its simplicity and effectiveness. While it’s a straightforward plugin, its power lies in the way it can drastically alter a sound, from subtly enhancing brightness and clarity to delivering extreme, destructive distortion. The plugin is incredibly versatile and easy to use, making it a go-to for both beginners and seasoned producers alike.

And the best part? It’s completely free to download! With no cost attached, Camel Crusher has become one of the most popular distortion plugins available, rivaling paid options in terms of quality and usability.

Download Camel Crusher Here: DOWNLOAD HERE


Camel Crusher’s Interface and Features

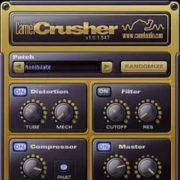
Camel Crusher’s interface is intuitive and clean, with only four main sections:

  1. Distortion: This section allows you to dial in the amount of grit you want to add. Pushing it to the max will completely saturate and distort your sound, while lower settings provide subtle warmth and crunch.
  2. Filter: The filter section allows you to cut certain frequencies, helping to shape the tone and eliminate unwanted noise.
  3. Compressor: Camel Crusher’s compressor adds punch and energy to your sound, tightening up the signal and making it more powerful.
  4. Master: The master section includes a dry/wet mix knob, giving you control over the balance between the original signal and the processed sound. This feature is essential for blending the effect smoothly into your mix.

This simple layout makes Camel Crusher incredibly easy to use, whether you’re looking for aggressive distortion or just a touch of saturation.

Tip: For new producers, try adjusting the dry/wet mix to keep your distortion subtle and blended. It’s a great way to enhance your sound without overwhelming it.


Camel Crusher’s Versatility

One of the reasons Camel Crusher is so popular is its versatility. Despite being a free plugin, it’s used across various genres to create a wide range of effects. For example:

  • Subtle Saturation: When used with low settings, Camel Crusher can add gentle warmth to synths, basslines, and even vocals, enhancing the mix without adding harshness.
  • Heavy Distortion: Push the Distortion knob to higher levels, and you’ll get a brutal, crunchy sound perfect for genres like dubstep, trap, and rock.
  • Punchy Drums: The compressor and distortion work wonders on drums, making them sound tighter and more aggressive, ideal for electronic and dance music.

Explore More: Looking for more free plugins to expand your toolkit? Check out our article on Top 10 Essential Plugin Types for DJs.


Why Camel Crusher Stands Out

Here’s why Camel Crusher is one of the most recommended free plugins:

  • It’s Free: High-quality free plugins are rare, and Camel Crusher stands out by providing exceptional distortion without any cost.
  • Simple and Effective Interface: With just four sections, Camel Crusher is easy to learn and quick to set up, so you can start creating without getting bogged down in settings.
  • Dry/Wet Control: The ability to mix the effect with the original signal lets you blend the distortion to taste, giving you control over how intense the effect feels.
  • Rich Sound Quality: The distortion and compressor offer a satisfying, musical character that enhances many types of sounds without sounding artificial.

Final Thoughts

Camel Crusher is one of those plugins that every producer should have in their toolkit. Whether you’re working on electronic music, rock, hip-hop, or any other genre, this distortion plugin will add a new layer of creativity to your workflow. And with its user-friendly interface, you don’t need to be a sound design expert to get the most out of it.

For DJs and producers looking to elevate their tracks without breaking the bank, Camel Crusher is an essential download. Get ready to add punch, warmth, and power to your sounds—all for free.

Synplant by Sonic Charge

Sonic Charge Synplant is a one-of-a-kind software synthesizer known for its ability to generate organic, evolving sounds with an intuitive interface and unique approach to sound design. Priced at $99 USD, Synplant has become a favorite among producers and artists like Flume, who appreciate its groundbreaking sound-shaping methods and distinctive aesthetics.

If you’re looking to add a fresh, experimental tool to your collection, here’s an in-depth look at why Synplant stands out from other synths on the market.


What Makes Synplant Unique?

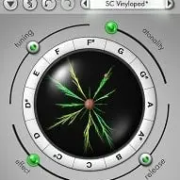
Unlike traditional synths that use typical oscillators, envelopes, and filters, Synplant takes inspiration from nature. At the heart of Synplant is a creative process that resembles growing a plant. Instead of setting parameters directly, you “plant a seed” at the center of an interface that resembles a potted plant. Each time you plant a seed, Synplant generates 12 branches, each representing a distinct yet related sound.


How Synplant Works

In Synplant, each branch that sprouts from the seed offers a different variation of the core sound. This unique approach to synthesis is intuitive yet highly explorative:

  1. Plant a Seed: You start by planting a “seed” at the center, which creates 12 branches.
  2. Explore Branches: Each branch produces a unique sound that’s slightly related to the original seed, allowing you to explore a range of sounds with a simple click.
  3. Replant for Variations: If you find a sound that catches your ear, you can replant that branch to create new branches that are variations on that particular sound.

With every replant, Synplant grows more sounds, creating a sense of progression and evolution in the sound design process. This approach is especially suited for producers looking for organic, evolving sounds that differ from the typically synthetic textures of many digital synthesizers.


Deep Customization with DNA Editing

If you want to take a deeper dive into a specific sound, Synplant offers DNA editing. This option opens up the underlying structure of the sound, allowing you to manipulate aspects like ADSR (Attack, Decay, Sustain, Release) settings, Noise oscillators, and LFO types.

The DNA editor lets you shape sounds more precisely once you’ve generated the basic timbre, making Synplant both an exploratory and a customizable synthesizer. While it’s not as complex as some other synths, the DNA editing gives producers enough control to tailor their sounds without getting bogged down in technicalities.

Related Reading: For other innovative tools that elevate your sound, check out our guide on Top 10 Essential Plugin Types for DJs.


Built-In and Downloadable Presets

Synplant offers an array of built-in presets that provide excellent starting points for various genres and sounds. These presets cover everything from ambient pads to textured plucks, making it easy to start creating right out of the box. Beyond the built-in sounds, many free preset packs are available online, created by the community to expand Synplant’s sonic palette.

Tip: These presets are a fantastic way to understand the full potential of Synplant, and they’re invaluable for producers who want quick inspiration without building sounds from scratch.


Pricing and Value

At $99 USD, Synplant is affordably priced given its innovative features and unique approach to sound design. For producers seeking an alternative to the typical subtractive or FM synthesis workflows, Synplant offers exceptional value. Its low price point also makes it an accessible entry into the world of experimental sound design.

For those looking to test the waters, Sonic Charge occasionally offers sales and discounts, making it even more budget-friendly. Considering its powerful features and the hours of creativity it offers, Synplant is worth every penny.

See More: For more plugins to enhance your DJ and production setup, don’t miss our article on RC-20 Retro Color and other popular FX plugins.


Why Synplant is a Game-Changer

Here’s why Synplant is an essential tool for any producer interested in exploring unique sounds:

  • Organic Sound Creation: Synplant’s evolving, nature-inspired process creates sounds that feel alive and fluid, unlike the rigid tones of conventional synths.
  • Intuitive Interface: The plant-based design makes it easy for beginners to dive in, while the DNA editor offers enough control for experienced producers.
  • Cost-Effective: At $99, Synplant offers excellent value, especially considering the unique sounds it can produce.
  • Community and Preset Support: With plenty of presets and resources available online, Synplant provides a wide range of sounds and ideas right out of the box.

Final Thoughts

Synplant by Sonic Charge is more than just a synthesizer—it’s a creative tool that inspires and challenges producers to think about sound design differently. Its innovative interface, organic sound possibilities, and affordability make it a fantastic addition to any producer’s toolkit. If you’re ready to bring a fresh perspective to your tracks, Synplant is a synthesizer worth exploring.

For more tools and tips on elevating your sound, check out our comprehensive guide on Top 10 Essential Plugin Types for DJs.

RC-20 Retro Color Plugin

If you’re a producer or DJ looking to add a rich, retro vibe to your sounds, the RC-20 Retro Color plugin might just be the perfect tool. This FX plugin has gained a massive following for its ability to transform any track, adding warmth, distortion, or unique lo-fi textures that mimic vintage equipment. Here’s a comprehensive look at RC-20, its features, and why it’s worth the investment.


What is RC-20 Retro Color?

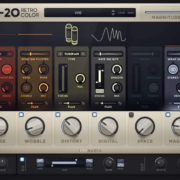
RC-20 Retro Color is an FX VST plugin that comes packed with six effect modules designed to infuse a nostalgic feel into your mix. Whether you want to add vinyl crackle, tape distortion, or bit reduction, this plugin has it all. For $99.95 USD, RC-20 offers versatile sound-shaping options that make it popular with artists across genres, from lo-fi hip-hop to electronic music.


The Interface and Features

The RC-20 interface may seem a bit overwhelming at first, especially with its wide array of controls. But with a closer look, you’ll find it’s intuitive and easy to navigate. This plugin offers six main modules:

  1. Noise – Adds sounds like vinyl crackle, static, and more.
  2. Wobble – Simulates tape pitch variations for a detuned feel.
  3. Distort – Brings in overdrive or saturated sounds.
  4. Digital – Emulates bit-crushing effects for a raw sound.
  5. Space – Adds reverb to create a sense of space.
  6. Magnetic – Gives tape saturation and delay effects.

Each module can be customized extensively, letting you fine-tune each effect to create unique sound textures.


Built-In Presets and Customization Options

One of the biggest advantages of RC-20 Retro Color is its 62 built-in presets. For producers who prefer using presets, these options make it easy to get started. These presets allow you to turn a simple piano or synth part into a captivating soundscape in seconds, adding harmonics, distortion, and character with just a few clicks.

Tip: If you’re just starting, check out the presets to get a feel for the plugin. With time, you’ll be able to customize and create your own signature sounds.


Unique Features that Set RC-20 Apart

One standout feature in RC-20 is the built-in filter, which is great for removing unwanted frequencies without needing an external EQ plugin. The filter offers a smooth and effective way to clean up your mix and focus on the frequencies that matter.

Another important feature is the Magnitude Fader located in the top-right corner of the interface. This acts as a global dry-wet control, allowing you to adjust the intensity of the entire plugin with a single slider. The Magnitude Fader is especially useful for creating automation, as it lets you add or reduce the effect in real-time, perfect for creating transitions or dynamic sections in your track.

Explore More: For producers who love experimenting with unique textures, RC-20’s Magnitude Fader adds a whole new layer of creativity. Learn how you can make your sound even more dynamic here.


The Cost and Splice Rent-to-Own Option

At $99.95 USD, RC-20 Retro Color might feel a bit pricey for some, but there’s good news: Splice offers a rent-to-own option. With this plan, you can pay for RC-20 over time, making it an affordable addition to your setup. Check out Splice’s payment options here.


Why RC-20 is Worth It

Here’s why RC-20 is a must-have in your toolkit:

  • Retro Sound Design: Whether you want your music to sound like it’s from the ’80s or ’90s, RC-20’s modules can replicate a wide range of retro effects.
  • Customization: Each effect module can be tailored to your needs, making it easy to add just the right amount of vintage character.
  • Built-In Filter: Clean up your sound directly within the plugin, saving you time and preserving CPU.
  • Magnitude Fader: Instantly adjust the intensity of your effects, giving you dynamic control for live mixing or production.

Final Thoughts

If you’re into creating unique, vintage-inspired soundscapes, RC-20 Retro Color is an investment that pays off. Its versatility and high-quality sound make it one of the best FX plugins on the market. For DJs and producers looking to add warmth, grit, or nostalgic vibes to their tracks, RC-20 offers tools that are both powerful and easy to use.

To read more about plugins that can transform your mixes, check out our other guide on Top 10 Essential Plugin Types for DJs.