Learn mixing techniques, controller tips, and tricks to improve your sets.

How to Prepare for Back-to-Back Sessions with Other DJs

Back-to-back (B2B) sessions, where two or more DJs perform together, are thrilling experiences for both the performers and the audience. However, executing a seamless B2B set requires preparation, communication, and adaptability. In this guide, we’ll explore how to coordinate effectively with your partner(s) to ensure your shared set becomes a standout performance.


Why Back-to-Back Sessions Are Special

B2B sets allow DJs to combine their unique styles, creating dynamic and unexpected musical journeys. These sessions often bring fresh energy to events, showcasing chemistry and creativity that a single DJ might not achieve alone. But, they also present challenges: mismatched styles, clunky transitions, or miscommunication can ruin the vibe.


Communicate Before the Session

The foundation of a successful B2B session is clear communication. Before stepping onto the stage, discuss the following with your partner:

  • Music Styles and Genres: Decide on the overall vibe. Are you blending house and techno, or sticking to a specific genre?
  • Energy Levels: Talk about how you’ll structure the set’s energy curve to keep the crowd engaged.
  • Song Selection: While you don’t need to share your entire library, discussing key tracks you plan to play helps avoid overlap.

Tip: Use collaborative playlists on platforms like Spotify or Rekordbox to exchange track ideas.


Understand Each Other’s Strengths

Every DJ has a unique style. Some excel in beatmatching, while others shine with creative transitions or effects. Identify each other’s strengths and let them guide your roles during the performance.

  • Transitions: Decide who will handle smoother transitions or experimental switch-ups.
  • FX and Loops: If one DJ is better at using effects or live looping, allow them to add those elements without overcrowding the mix.

Practice Together

If possible, meet up and rehearse before the event. This builds chemistry and helps you understand each other’s timing, style, and workflow.

  • Practice Timing: Experiment with how long each DJ should play before switching. Some B2B sets alternate every 2–3 tracks, while others switch after longer mini-sets.
  • Gear Familiarity: Ensure both DJs are comfortable with the equipment. If you’re using external gear, such as drum machines or samplers, rehearse how to integrate them smoothly.

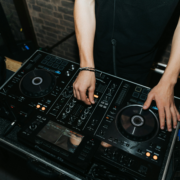
Divide Responsibilities on Stage

When sharing a setup, knowing who handles what ensures smoother execution. For example:

  • One DJ handles EQs and volume faders while the other cues the next track.
  • Take turns controlling effects and loops, so the mix doesn’t feel overcrowded.
  • If using dual laptops with controllers, decide who will lead transitions for key moments like drops or breakdowns.

Adapt to the Crowd

One of the most exciting aspects of a B2B set is spontaneity. While planning is essential, leave room to adapt based on the crowd’s energy.

  • Read the Room: If the audience responds enthusiastically to a specific style, lean into it, even if it deviates from your plan.
  • Dynamic Flow: Stay flexible with track selection to maintain a cohesive energy.

Stay in Sync

Synchronization is crucial for a seamless B2B experience. Here’s how to stay on the same page:

  • Eye Contact: Non-verbal communication is key. A quick glance can signal when it’s time to transition.
  • Hand Gestures: Use simple gestures to indicate actions like a track drop, filter sweep, or tempo adjustment.
  • Headphones Sharing: If both DJs need to hear the same cue, sharing headphones can help ensure smoother transitions.

Create Moments of Surprise

One of the biggest advantages of a B2B set is the ability to surprise the audience. Work together to create standout moments:

  • Unexpected Track Drops: Drop a classic or unexpected track at just the right moment for maximum impact.
  • Live Remixing: If you’re skilled with samplers or effects, remix a track live to create something unique.
  • Collaborative Transitions: Blend elements from two tracks simultaneously, highlighting the fusion of both DJs’ styles.

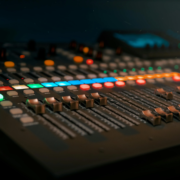
Manage the Technical Setup

A successful B2B session requires a smooth technical setup. Here’s what to consider:

  • Audio Routing: If using separate laptops or controllers, ensure proper routing into the mixer.
  • Sync Options: Decide whether to use sync features or rely on manual beatmatching.
  • Backup Gear: Bring spare cables, USBs, and headphones to avoid disruptions.

Embrace Mistakes Gracefully

Mistakes can happen in the heat of a live performance. Whether it’s a missed cue or a clunky transition, handle it with confidence:

  • Stay Calm: A minor error is often unnoticed by the crowd if you don’t draw attention to it.
  • Recover Quickly: Use effects, loops, or filters to mask mistakes and transition smoothly.
  • Keep the Energy Up: A well-timed track can quickly shift focus back to the music.

End on a High Note

Plan your final moments to leave a lasting impression. Coordinate your closing tracks to ensure a strong finish that resonates with the audience.

  • Grand Finale: Choose an anthem or high-energy track that encapsulates the set’s vibe.
  • Seamless Hand-Off: If another act is following you, transition smoothly to their first track.

Back-to-back sessions are a unique opportunity to showcase collaboration, creativity, and chemistry with another DJ. By communicating, practicing, and staying adaptable, you can elevate your B2B performances to unforgettable heights.

Want to learn more tips to improve your DJing? Visit mp4remix.com for additional guides, resources, and inspiration to level up your craft.

How to Draw Inspiration from Past Music to Create Modern DJ Sets

In a world where music evolves at lightning speed, looking back can be the key to moving forward. As a DJ, blending retro styles with modern trends is not just a way to stand out but also a chance to craft a unique musical identity. From the grooves of disco to the raw energy of rock, classic genres offer endless inspiration for building innovative and unforgettable sets.

In this guide, we’ll explore how to seamlessly fuse retro sounds with contemporary beats, discover sources of inspiration, and ensure your DJ sets resonate with audiences of all generations.


Why Look to the Past?

The music of the past holds timeless qualities that continue to inspire producers, DJs, and audiences alike. Here’s why retro influences can transform your sets:

  • Timeless Appeal: Classics evoke nostalgia, creating an emotional connection with your audience.
  • Unique Soundscapes: Incorporating vintage elements helps you stand out in an era dominated by mainstream hits.
  • Cross-Generational Reach: Blending old and new sounds allows you to cater to diverse audiences.

Explore Retro Genres

To effectively incorporate retro influences, you need to dive into the genres that shaped modern music. Here are some classics to consider:

  • Disco and Funk: Perfect for adding groove and energy to your sets. Artists like Chic and Earth, Wind & Fire are great starting points.
  • 80s Synthwave: Think of the iconic sounds of Depeche Mode or The Human League for atmospheric, synth-driven vibes.
  • 90s Hip-Hop and R&B: Sample-rich tracks from A Tribe Called Quest or Missy Elliott can bring depth to your mixes.
  • Classic Rock: Guitar riffs from bands like Led Zeppelin or Queen can add raw energy to your transitions.
  • House and Techno Origins: Revisit pioneers like Frankie Knuckles or Jeff Mills to see how the roots of EDM can be reimagined.

Blend Retro with Modern Trends

The magic happens when you find the balance between old-school vibes and current hits. Here’s how:

1. Mashups and Remixes

Create mashups that combine retro melodies with modern beats. For example, pairing a 70s funk bassline with contemporary house percussion can give your audience a fresh perspective on familiar sounds.

2. Sampling

Sampling is one of the most effective ways to incorporate retro influences. Use snippets of iconic tracks and layer them with modern instrumentation or effects. Tools like Ableton Live and Serato Studio make this process seamless.

3. Transitioning Across Eras

Master the art of transitions to take your audience on a journey through time. Use tempo changes and key matching to blend tracks from different decades smoothly.

4. Reimagining Vintage Sounds

Recreate retro sounds with modern technology. Many synth plugins and sample packs are designed to emulate vintage gear like the Roland TR-808 or Moog synthesizers.

5. Collaborate with Vocals

Adding vocalists who can reinterpret old classics with a modern twist is a powerful way to connect eras.


Curate Your Set with Purpose

Your audience should feel the story behind your mix. Here’s how to curate your set for maximum impact:

  • Start with Nostalgia: Open your set with a recognizable classic to grab attention.
  • Layer the New and Old: Alternate between retro and modern tracks to keep the energy dynamic.
  • Save Surprises for the Drop: Incorporate iconic riffs or samples in the build-up to create memorable drops.
  • Close with Impact: End your set with a blend that showcases both your technical skills and your unique sound.

Tools and Resources for Retro Inspiration

To effectively incorporate retro elements, equip yourself with the right tools:

  • Digital Libraries: Platforms like Tracklib, Beatport, or Splice offer samples and tracks from different decades.
  • Analog Equipment: Use vintage gear like turntables or retro synths to capture authentic sound textures.
  • Re-edits: Look for re-edits of classic tracks that are optimized for modern mixing.
  • Documentaries and Books: Learn about the history of music to gain deeper insights into retro styles.

Step 5: Stay Authentic

While drawing inspiration from the past, it’s essential to maintain your authenticity as an artist. Avoid simply copying older styles—instead, aim to reinterpret them in a way that aligns with your creative vision.

Key Tips for Authenticity:

  • Add your unique touch to every retro element you incorporate.
  • Experiment with unexpected genre pairings.
  • Use retro influences as a foundation rather than the sole focus of your set.

Examples of Retro-Modern Fusion in Action

Some of the most successful DJs have mastered the art of blending past and present:

  • Daft Punk: Known for combining disco and funk with futuristic electronic sounds.
  • DJ Shadow: A pioneer in sampling, turning obscure records into new creations.
  • Purple Disco Machine: Brings a fresh twist to classic disco tracks, making them festival-ready.

Why Retro-Modern Fusion Is Here to Stay

Blending retro and modern music isn’t just a trend—it’s a way to bridge generations and create timeless sets. By experimenting with styles, digging into music history, and using modern tools, you can craft sets that captivate and inspire.

Are you ready to elevate your DJ sets with the perfect mix of past and present? Find more tips and inspiration at mp4remix.com, your go-to resource for everything DJs need to thrive in today’s music scene.

Improvisation Techniques for DJs: Mixing Creatively in Real-Time

In the art of DJing, planning a set is essential, but mastering improvisation is what sets great DJs apart. When you go beyond pre-made playlists and rigid track orders, you unlock the ability to respond to the moment, read the crowd, and create a dynamic, unforgettable experience. This article dives into live mixing techniques and strategies for developing your improvisational skills as a DJ.


Why Improvisation Matters in DJing

Improvisation is the ultimate way to connect with your audience and keep the energy alive. Here’s why it’s crucial:

  • Adapt to the Crowd: No two audiences are the same. Improvisation allows you to adjust your set based on crowd energy, mood, or requests.
  • Create Unique Experiences: By mixing tracks on the fly, you can deliver sets that are one-of-a-kind and memorable.
  • Stay Flexible: Technical issues or sudden changes in event flow (like a delayed headliner) require a DJ to think on their feet.

To truly embrace improvisation, you need the right mindset, technical skills, and creative vision.


1. Master Your Equipment

Before you can improvise confidently, you must have complete control over your gear. Whether you use turntables, CDJs, or a controller, knowing your setup inside out is non-negotiable.

Key Skills to Practice:

  • Beatmatching by Ear: Automatic sync can fail, so train your ears to manually match tempos.
  • Hot Cues and Looping: Learn how to set and trigger hot cues to jump between sections of a track and create live remixes.
  • EQ and Filters: Experiment with EQ adjustments and filters to make smoother transitions between tracks or emphasize specific elements of a song.
  • FX Usage: Practice using effects like reverb, delay, and echo to enhance transitions or create dramatic builds.

The better you know your gear, the freer you’ll feel to experiment and take creative risks.


2. Learn to Read the Crowd

A key part of live improvisation is crowd reading. Pay attention to how the audience reacts to different tracks, tempos, and genres.

Techniques for Crowd Reading:

  • Observe Body Language: Are people dancing more to faster tracks or groovier beats? Adjust accordingly.
  • Experiment with Genres: Drop an unexpected track and gauge the crowd’s reaction. This can help you pivot your set if needed.
  • Watch for Energy Drops: If the energy on the dance floor starts to fade, it might be time for a high-energy track or a well-timed drop.

For more tips on engaging your audience, check out mp4remix.com.


3. Mix on the Fly with Harmonic Awareness

Improvisation doesn’t mean chaos—it requires structure, especially when mixing live. One of the best ways to ensure smooth transitions is by understanding harmonic mixing.

Steps to Mix Harmonically in Real-Time:

  1. Identify Key-Compatible Tracks: Use tools like Mixed In Key or your DJ software to organize tracks by key.
  2. Practice Key Changes: Learn how to move between compatible keys (e.g., from C minor to G minor) to avoid clashing sounds.
  3. Blend Melodies Live: Experiment with layering melodies from two tracks to create unique combinations.

Harmonic mixing ensures that your improvisation sounds seamless, even when blending completely different tracks.


4. Use Live Remixing Techniques

Improvisation is the perfect opportunity to inject your creativity into your sets. Live remixing can transform familiar tracks into something entirely new.

Techniques for Live Remixing:

  • Looping: Create loops on the fly to extend breakdowns or build tension before a drop.
  • Layering Samples: Use drum loops, vocals, or synth stabs to add depth to your set.
  • Mashups: Experiment with layering the vocals from one track over the instrumental of another to create a surprise moment for the audience.

Your ability to remix live adds a personal touch that sets you apart from other DJs.


5. Build a Flexible Library

Improvisation depends on having a diverse and well-organized music library.

Tips for a Versatile Collection:

  • Tag Your Tracks: Use tags like “high energy,” “chill,” or “peak time” to quickly find the right song for any moment.
  • Prepare Playlists for Genres and Moods: While you don’t want to rely on pre-made playlists, having categorized options helps you respond faster.
  • Include Wild Cards: Keep a selection of unexpected tracks (e.g., a nostalgic classic or a bold genre shift) to surprise the crowd.

A well-curated library ensures that you’re never at a loss for what to play next.


6. Embrace Mistakes and Stay Confident

Improvising live can be intimidating, especially if something doesn’t go as planned. However, small mistakes can be part of the charm.

How to Handle Mistakes:

  • Stay Calm: If you miss a beat or a cue, quickly adjust and move on. Most of the audience won’t notice.
  • Turn Errors into Creative Moments: Use unexpected transitions or effects to turn a mistake into a new creative direction.
  • Trust Your Instincts: Confidence is key—if you believe in your choices, the crowd will too.

Remember, DJing is as much about energy and presence as it is about technical perfection.


The Joy of Improvisation

Improvising in your sets allows you to connect deeply with your audience and express yourself creatively in the moment. By mastering your gear, reading the crowd, and developing live remixing skills, you’ll be able to craft unforgettable performances.

If you want to take your DJing skills to the next level, check out more tips and guides at mp4remix.com.

Unleash your creativity, embrace the unexpected, and let improvisation elevate your sets to new heights!

pexels-jacobmorch-426976

As a DJ, your role goes beyond simply playing tracks; you have the power to create an emotional journey for your audience. By crafting a set with a compelling narrative, you can make your performance unforgettable. Storytelling through music is an art that combines thoughtful song selection, seamless transitions, and powerful moments to connect with listeners on a deeper level.

This guide will walk you through the key steps to transform your sets into captivating stories that resonate with your audience.


Step 1: Define the Story You Want to Tell

Every story starts with an idea. Think about the emotions or message you want to convey in your set:

  • Are you building an uplifting, euphoric experience?
  • Do you want to take your audience on a dark, introspective journey?
  • Is your set designed to energize a festival crowd or create an intimate vibe in a club?

Understanding the mood and theme of your set will help you make intentional song selections. Visualize the “plot” of your musical story, including moments of tension, resolution, and climax.


Step 2: Curate a Cohesive Tracklist

Your song choices are the foundation of your storytelling. To create a narrative:

  • Start Strong: Open with a track that grabs attention and sets the tone for your story.
  • Build Gradually: Choose songs that naturally escalate the energy or deepen the mood. Avoid abrupt changes that might disrupt the flow.
  • Add Layers of Emotion: Include tracks that evoke different feelings, such as nostalgia, excitement, or calmness, to keep the audience engaged.
  • Plan Your Peaks and Valleys: Alternate between high-energy drops and quieter, more introspective moments to create dynamic pacing.

For example, you might begin with atmospheric tracks, slowly transition into uplifting beats, and finish with an explosive drop that leaves the crowd in awe.


Step 3: Use Transitions to Weave the Story Together

Smooth transitions are essential for maintaining the flow of your narrative. Use techniques such as:

  • Beatmatching: Ensures that your tracks blend seamlessly, keeping the audience immersed.
  • EQ Mixing: Gradually introduce or fade out elements like bass, mids, or highs to guide the emotional shift between songs.
  • Key Mixing: Select tracks in complementary keys to maintain musical harmony and avoid jarring changes.

Transitions should feel natural, as if one track is an extension of the other. This continuity helps your audience stay connected to the story.


Step 4: Highlight Key Moments with Drops and Climaxes

Every great story has pivotal moments, and in a DJ set, these are often represented by drops and climaxes. To make these moments impactful:

  • Build Anticipation: Use breakdowns or gradual buildups to heighten tension before the drop.
  • Surprise the Audience: Occasionally include unexpected elements, such as a vocal sample or a unique effect, to keep them guessing.
  • Time the Drop Strategically: Align it with the crowd’s energy level to maximize the emotional impact.

These moments are the peaks of your story and should feel like the payoff for the journey you’ve created.


Step 5: Close with a Memorable Resolution

Just as a good story has a satisfying ending, your set should leave the audience feeling fulfilled. Consider these approaches:

  • Bring the Energy Full Circle: Return to themes or motifs from the beginning of your set for a sense of closure.
  • Leave on a High Note: End with a track that resonates emotionally and keeps the crowd talking long after your performance.

A well-executed ending ensures your story lingers in the minds of your listeners.


Step 6: Connect with Your Audience

Storytelling is not just about the music—it’s also about creating a connection with your audience. Engage them by:

  • Reading the Crowd: Adjust your set in real time based on the energy and reactions of the crowd.
  • Using Visuals and Effects: Sync your set with visuals, lights, or even spoken interludes to enhance the narrative.
  • Showing Your Personality: Let your passion and energy shine through your performance to forge a deeper bond with your listeners.

Step 7: Practice and Refine Your Craft

Storytelling through music takes time and experimentation. Practice by:

  • Creating different narratives for various settings, such as clubs, festivals, or private events.
  • Recording your sets and analyzing how well the story flows.
  • Experimenting with new techniques, like live looping or layering acapellas, to add depth to your narrative.

Conclusion

Mastering the art of storytelling through music can elevate your DJ sets from good to unforgettable. By carefully crafting a narrative with your song selections, transitions, and climaxes, you can create an emotional experience that keeps your audience coming back for more.

Ready to take your DJing to the next level? Visit mp4remix.com for more tips, resources, and inspiration. With practice and creativity, you can turn every set into a story worth remembering.

Start telling your story today—one beat at a time!

pexels-maumascaro-1716398 (1)

In today’s highly competitive music scene, having a unique musical identity is essential for standing out as a DJ. Your identity is not just about the music you play but also how you present yourself, connect with your audience, and build a brand that resonates with fans. This guide will explore how DJs can develop their own style to differentiate themselves in the industry.

Why Is a Unique Musical Identity Important?

In a world where countless DJs are vying for attention, having a distinctive style ensures you’re memorable. A well-defined identity helps you:

  • Attract a loyal audience who resonate with your sound.
  • Get booked for events that align with your musical vision.
  • Stand out from the sea of other DJs blending into trends.

Whether you’re spinning at clubs, producing tracks, or performing at festivals, your musical identity is the foundation of your brand.


Step 1: Find Your Niche

The first step in creating a unique identity is discovering your niche. Ask yourself:

  • What genres or subgenres excite you the most?
  • What emotional or cultural connections do you want your music to evoke?
  • How can you combine elements of different styles to create something fresh?

For example, some DJs blend house music with ethnic instruments, while others focus on trap-infused EDM. Defining your niche doesn’t mean limiting yourself—it means creating a consistent sound that people associate with your name.


Step 2: Incorporate Diverse Influences

Your identity can be enriched by drawing inspiration from a wide range of sources:

  • Cultural Influences: Explore your roots or experiment with global sounds to bring a unique flavor to your sets.
  • Non-Musical Art: Film, fashion, and visual art can influence your creative direction.
  • Other DJs or Producers: Study how successful DJs like Carl Cox or Charlotte de Witte incorporate their signature sounds, but don’t copy—innovate.

By incorporating diverse influences, you create a musical palette that reflects your personality and vision.


Step 3: Develop a Personal Style

Your personal style as a DJ extends beyond music. Think about:

  • Your Visual Brand: Logo, social media presence, and even your stage attire should align with your identity.
  • Stage Presence: How you interact with the crowd can set you apart. Are you energetic and engaging, or do you let the music speak for itself?
  • Mixing Techniques: Incorporating unique transitions, live remixes, or signature effects can make your sets instantly recognizable.

Step 4: Build a Coherent Brand

Your brand is the public-facing representation of your musical identity. To build a strong brand:

  1. Be Consistent Across Platforms: Your social media, website, and promotional materials should have a unified look and message.
  2. Create Original Content: Post videos of your mixes, behind-the-scenes studio sessions, or even tutorials to engage your audience.
  3. Use Your Voice: Whether through blogs, interviews, or captions, let your personality shine.

For inspiration on how to build a DJ brand, visit our blog at mp4remix.com.


Step 5: Connect with Your Audience

Building a fanbase is about more than just playing great music. Focus on:

  • Interacting with Fans: Respond to comments on social media, take song requests, or even host Q&A sessions.
  • Playing Gigs Aligned with Your Brand: Choose events and venues that align with your niche to attract the right crowd.
  • Creating an Emotional Connection: People remember how you make them feel. Let your passion shine through every performance.

Step 6: Stay True to Yourself While Adapting

As trends in music evolve, it’s important to adapt without losing your essence. Innovate within your niche and experiment, but ensure your core identity remains intact. This balance will keep your music fresh while maintaining a sense of authenticity.


Conclusion

Creating a unique musical identity as a DJ is a journey of self-discovery, experimentation, and connection. By finding your niche, incorporating diverse influences, and building a coherent brand, you can set yourself apart in the competitive world of DJing.

If you’re ready to take your DJ career to the next level, check out more tips and resources at mp4remix.com. With the right mindset and tools, you can create an identity that resonates with audiences and propels your career forward.

Start building your unique identity today, and let your music speak for itself!

4

pexels-wendywei-1677710

In the world of Electronic Dance Music (EDM), the drop is the heart and soul of a track. It’s the moment that sends the crowd into a frenzy, a culmination of tension, energy, and creativity. As a producer or DJ, knowing how to create impactful drops is crucial to making your tracks memorable and club-ready.

In this guide, we’ll walk you through everything you need to know about crafting powerful EDM drops, including techniques, tips, and tools. For more production tips and resources, visit mp4remix.com.


What Is a Drop in EDM?

The drop is the section of a track where the energy reaches its peak after a buildup, often characterized by a shift in dynamics, basslines, and drum patterns. A strong drop can make or break a track, so perfecting it is essential.


Step 1: Understand the Anatomy of a Drop

A great drop typically includes:

  • Powerful Drums: Punchy kicks and snares that dominate the mix.
  • Heavy Basslines: Sub-bass or distorted bass that drives the energy.
  • Unique Lead Elements: Synths, vocal chops, or sound effects that stand out.
  • Impactful Transitions: Seamless movement from the buildup into the drop.

Step 2: Build Tension in the Buildup

The effectiveness of a drop relies heavily on the tension created beforehand.

1. Use Automation

  • Gradually increase filter cutoffs, pitch, or volume in the buildup to create a sense of rising energy.
  • Automate reverb and delay to make sounds swell and fade dramatically.

2. Layer Percussion

  • Introduce rolling hi-hats, snare rolls, or claps to quicken the track’s pace.
  • Use triplets or off-beat rhythms to add variety and anticipation.

3. Add Vocal Teasers

  • Use chopped vocals or short phrases to hint at the incoming drop.
  • Pitching up or down the vocals can add more drama.

4. Silence is Golden

  • Incorporate a brief moment of silence or a low-pass filter sweep right before the drop hits to maximize its impact.

Step 3: Crafting the Drop Itself

1. Focus on the Kick and Bass

  • The Kick: Your kick should punch through the mix, especially in bass-heavy genres like dubstep or house. Use sidechain compression to ensure the kick doesn’t clash with the bass.
  • The Bass: Layer sub-bass with mid-bass to create depth and fullness. Experiment with distorted basslines or wobble effects for more character.

2. Design a Catchy Lead Synth

  • Use a combination of virtual synths like Serum, Massive, or Sylenth1 to create dynamic and textured lead sounds.
  • Layer multiple synth patches to add complexity, such as combining plucks with wide supersaws.

3. Add Ear Candy

  • Sprinkle in sound effects like risers, downlifters, impacts, and white noise sweeps to fill out the drop.
  • Use vocal chops or glitches to add unique textures.

4. Play with Rhythm and Groove

  • Switch up drum patterns to keep the drop exciting. For example, you can alternate between four-on-the-floor kicks and syncopated rhythms.
  • Use swing or groove settings in your DAW to humanize the drop’s feel.

Step 4: Layering and Sound Design

1. Layer Your Sounds

  • Combine multiple drum samples to create thicker and more complex hits.
  • Layer synths to achieve a fuller and more powerful sound. For example, pair a bright lead with a gritty, detuned synth underneath.

2. Use Effects Creatively

  • Add distortion to basslines for grit and energy.
  • Use delay and reverb sparingly to give sounds space while maintaining clarity.
  • Try phasers, flangers, or bitcrushers for unique textures.

Step 5: Mixing and Mastering the Drop

A poorly mixed drop won’t have the impact you want, no matter how good the design is.

1. Prioritize the Kick and Bass

  • Ensure the kick is the loudest element in the mix, with the bassline sitting just below it in terms of volume.
  • Use EQ to carve out space for each element, avoiding frequency clashes.

2. Use Sidechain Compression

  • Apply sidechain compression to the bass, synths, and pads to ensure the kick cuts through cleanly.

3. Keep the Highs Crisp

  • Use high-frequency elements like cymbals, white noise, and bright synths to keep the drop lively.

4. Test on Multiple Systems

  • Play your track on headphones, studio monitors, and even a car stereo to ensure the drop translates well across all listening environments.

Pro Tips for Creating Memorable Drops

  1. Keep It Simple: Don’t overcomplicate your drop. Focus on a few key elements that pack a punch.
  2. Reference Tracks: Analyze drops from your favorite producers to understand their structure and techniques.
  3. Experiment: Push boundaries by trying unconventional sounds, rhythms, or effects.

Tools for Crafting Powerful Drops

  • DAWs: Ableton Live, FL Studio, Logic Pro X.
  • Plugins: Serum, Massive, FabFilter Pro-Q, OTT.
  • Sample Packs: Check out Splice or Loopmasters for high-quality EDM samples.
  • Effects: iZotope Trash 2, Valhalla Reverb, Soundtoys Decapitator.

Final Thoughts

Crafting a powerful drop takes time, experimentation, and attention to detail. By mastering the techniques outlined above, you’ll be well on your way to creating drops that captivate listeners and dominate the dancefloor.

Ready to take your EDM production skills to the next level? Visit mp4remix.com for more tips, tools, and resources tailored to DJs and producers.

How to Build Your Own Sample and Stem Library

Every successful DJ and producer knows the importance of having a well-organized, personalized library of samples and stems. This library becomes your creative toolbox, enabling you to craft unique tracks and remixes effortlessly. Whether you’re starting from scratch or looking to upgrade your current collection, creating a professional-grade library is a game-changer for your workflow and creativity.

In this guide, we’ll break down everything you need to know about building a sample and stem library, from sourcing to organizing, and how it can elevate your music production. For more tips and resources on remixing and DJing, don’t forget to check out mp4remix.com.


What Are Samples and Stems?

  • Samples: Short clips of audio, often a few seconds long, that can be used in a variety of ways in music production. These can include drum hits, vocal snippets, synth loops, and more.
  • Stems: Isolated elements of a track, such as vocals, drums, basslines, and melodies, allowing you to remix or rearrange the song.

Building your own library means having instant access to the sounds that define your unique style as a DJ or producer.


Step 1: Sourcing High-Quality Samples and Stems

1. Record Your Own Sounds

  • Field Recording: Use a portable recorder or your smartphone to capture ambient sounds, percussion from household objects, or even your own voice.
  • Studio Recording: If you have access to a studio, record instrumentals or vocal clips to create exclusive content.

2. Use Sample Libraries

  • Platforms like Splice, Loopmasters, and Noiiz offer extensive libraries of royalty-free samples across all genres.
  • Look for genre-specific packs that suit your music style, whether it’s house, techno, or hip-hop.

3. Extract Stems from Tracks

  • Tools like iZotope RX or Stem Creator by Audionamix allow you to separate vocals, drums, and other elements from existing tracks.
  • Some DAWs, like Serato DJ Pro, now offer real-time stem separation for on-the-fly creativity.

4. Collaborate with Musicians

  • Work with vocalists, instrumentalists, or other producers to create unique samples and stems for your library.

5. Download Free Samples

  • Websites like Freesound.org or producer forums often have free sample packs, but be sure to check licensing terms.

Step 2: Organizing Your Sample and Stem Library

A cluttered library can slow down your workflow, so proper organization is key.

1. Categorize by Type

Create folders for categories such as:

  • Drums (Kicks, Snares, Hi-Hats, Percussion)
  • Basslines
  • Melodies and Synth Loops
  • Vocals (Dry and Processed)
  • FX (Risers, Downlifters, White Noise)

2. Use Genre Tags

If you produce or mix multiple genres, tag your files accordingly (e.g., “House,” “Trap,” “Techno”).

3. Name Your Files Properly

Instead of generic names like “Track1.wav,” use descriptive labels such as “Techno_Kick_120BPM.wav.” This makes searching much easier.

4. Implement a Searchable System

Software like Resonic Player, Soundly, or even the built-in browser in your DAW can help you quickly locate files.

5. Backup Your Library

  • Use cloud services like Google Drive, Dropbox, or external hard drives to prevent losing your valuable library.
  • Consider versioning your library to keep track of updates and changes.

Step 3: Customizing Your Library

1. Edit and Process Samples

  • Use your DAW to tweak samples to your liking, such as adding EQ, compression, or effects.
  • Create variations of the same sample (e.g., pitching up/down, reversing).

2. Create Your Own Sample Packs

  • Bundle your best samples into packs that align with your style. This is especially useful if you want to share or sell them.

3. Use Plugins for Manipulation

  • Tools like Output Arcade and Serato Sample let you manipulate and transform your samples, giving them a fresh twist.

Step 4: Maintaining Your Library

  • Regular Updates: Add new samples and stems regularly to keep your library fresh and inspiring.
  • Purge Unused Files: If you haven’t used a file in months, consider archiving or deleting it to save space.
  • Quality Control: Only include high-quality, professional-grade sounds.

Why Building Your Own Library Matters

Having a personalized sample and stem library gives you creative freedom and speeds up your production process. It also helps you define your unique sound, setting you apart from other DJs and producers.

Ready to start building your library? Visit mp4remix.com for more expert tips and resources tailored to DJs and producers.


Final Thoughts

Creating your own sample and stem library is an investment in your artistry. By sourcing high-quality sounds, organizing them effectively, and continuously updating your collection, you’ll have everything you need to create standout tracks and remixes.

Take control of your music production workflow and start building your library today. Who knows? The next iconic remix could come from your personal collection!

4

Turntablism for Beginners - Tricks and Techniques for Scratching

Turntablism is an art form that elevates DJing to a whole new level, transforming turntables into musical instruments. At the heart of turntablism lies the scratching technique, where DJs manipulate vinyl records to create unique, percussive sounds. Whether you’re an aspiring turntablist or a DJ looking to expand your skills, this guide will introduce you to the basics of scratching, essential techniques, and tips to get started.

If you’re eager to take your DJ skills to the next level, keep reading!


What is Turntablism?

Turntablism is the art of using turntables and a mixer to create music, rhythms, and sound effects. Unlike traditional DJing, which focuses on playing and blending tracks, turntablism involves live manipulation of sound.

Scratching is one of the most recognizable elements of turntablism, but other techniques like beat juggling, body tricks, and tone play are also key aspects of this art form.


Why Learn Scratching?

Scratching adds a layer of creativity and personality to your sets. It allows you to:

  • Stand Out: Showcase unique skills that set you apart from other DJs.
  • Interact with the Crowd: Scratching can be a dynamic performance element, captivating audiences.
  • Experiment Musically: Add flair to your mixes by integrating rhythmic and percussive sounds.

Essential Equipment for Turntablism

To begin your journey into scratching, you’ll need the right gear. Here’s a basic setup:

  1. Turntables: Direct-drive turntables are ideal for scratching due to their durability and precision. Popular models include the Technics SL-1200 or the RANE Twelve.
  2. Mixer: Look for a DJ mixer with a responsive crossfader designed for scratching, like the Pioneer DJM-S11 or RANE SEVENTY.
  3. Vinyl Records: Start with scratch-specific vinyl or records with looped beats and samples.
  4. Slipmats: These reduce friction between the vinyl and turntable, allowing for smoother movement.
  5. Headphones: High-quality headphones for precise cueing and monitoring.

Basic Scratching Techniques

Start with these fundamental scratches to build your foundation:


1. Baby Scratch

The simplest scratch to learn and the starting point for all beginners.

  • How to Do It:
    1. Place your hand on the record.
    2. Move it forward and backward without letting it play fully.
    3. Keep the fader open so the sound is audible.
  • Tip: Focus on rhythm and control. This technique is great for building muscle memory.

2. Transformer Scratch

Named after its robotic sound, this technique involves rapidly toggling the crossfader while moving the record.

  • How to Do It:
    1. Hold the record and push it forward and backward.
    2. Toggle the crossfader on and off to create choppy sounds.
  • Tip: Start slowly and gradually increase your speed for sharper cuts.

3. Chirp Scratch

A more advanced technique that combines precise fader control with record movement.

  • How to Do It:
    1. Push the record forward while closing the fader.
    2. Pull the record back while opening the fader.
  • Tip: Focus on timing the fader movements with the record for clean chirps.

4. Stab Scratch

This scratch is short, sharp, and percussive.

  • How to Do It:
    1. Push the record forward while flicking the fader open and then quickly closing it.
    2. Pause before pulling the record back.
  • Tip: Use this technique to emphasize beats or accents.

5. Scribble Scratch

A rapid, chaotic scratch that adds texture to your performance.

  • How to Do It:
    1. Rapidly move the record back and forth in short motions.
    2. Keep the fader open for continuous sound.
  • Tip: Incorporate this scratch sparingly for dramatic effect.

Practicing Your Scratches

Like any skill, mastering scratching takes practice. Here are some tips to accelerate your progress:

  • Start Slow: Focus on precision and timing before increasing speed.
  • Use Simple Beats: Practice over a looped beat to keep your rhythm consistent.
  • Record Yourself: Listen back to identify areas for improvement.
  • Dedicate Time: Spend at least 15–30 minutes a day practicing.

Incorporating Scratches into Your Sets

Scratching isn’t just a standalone skill; it’s a tool you can use to enhance your mixes. Here’s how to incorporate it into your DJ sets:

  1. Intro Flair: Add scratches to your intro to grab attention.
  2. Transition Highlights: Use scratches to emphasize transitions between tracks.
  3. Live Remixing: Combine scratching with effects or loops for creative remixes.

Challenges Beginners Face

Scratching can be intimidating at first, but overcoming these challenges will help you improve:

  • Coordination Issues: Practice moving the record and crossfader simultaneously to develop muscle memory.
  • Offbeat Timing: Start with slower beats to stay in rhythm.
  • Gear Limitations: Invest in quality equipment for a smoother learning experience.

Inspiration from Turntable Legends

Learning from the masters is a great way to stay motivated. Explore performances by legendary turntablists like:

  • DJ Qbert: Known for his innovative techniques and precise control.
  • DJ Craze: A three-time DMC World Champion.
  • Grandmaster Flash: A pioneer of scratching and turntablism.

Take Your Turntablism to the Next Level

Once you’ve mastered the basics, experiment with advanced techniques like beat juggling, tone play, and creating routines. These skills will transform your scratching into a full-fledged performance art.


Final Thoughts

Turntablism is more than just a DJ skill—it’s an art form that allows you to express yourself creatively. By practicing the fundamental scratches, experimenting with your own techniques, and staying inspired by the greats, you can take your DJing to new heights.

Ready to elevate your DJ skills? Visit mp4remix.com for more tips, guides, and resources to enhance your turntablism journey. Start practicing today, and let the scratches speak for themselves!

4

Complete Guide to Mastering Beatmatching

Beatmatching is one of the most fundamental skills every DJ must master. It’s the art of seamlessly syncing two tracks so their beats align, creating smooth transitions and maintaining the energy on the dance floor. While modern DJ equipment offers sync buttons, learning manual beatmatching builds a deeper understanding of rhythm, tempo, and music structure, elevating your DJing skills.

In this guide, we’ll break down the steps to master beatmatching, provide tips for practicing effectively, and explain why this skill remains essential in today’s DJing world.


What is Beatmatching?

At its core, beatmatching involves adjusting the tempo and aligning the beats of two tracks so they play in sync. This technique allows DJs to mix songs seamlessly, maintaining a consistent flow and avoiding abrupt changes that could disrupt the vibe.

Key Elements of Beatmatching:

  • Tempo Matching: Adjusting the speed of one track to match the other.
  • Beat Alignment: Ensuring the beats of both tracks are perfectly synced.
  • Cueing: Preparing the next track to drop at the right moment.

Why Beatmatching Matters

Even with the advent of auto-sync technology, manual beatmatching remains a vital skill for several reasons:

  • Creative Control: Manual beatmatching gives you greater flexibility and precision in your mixes.
  • Skill Development: It sharpens your ear for rhythm and timing, making you a more versatile DJ.
  • Professionalism: Many DJs and audiences respect those who can beatmatch without relying solely on technology.

How to Master Beatmatching

Follow these step-by-step instructions to learn and perfect beatmatching:


Step 1: Understand Your Gear

Before diving into beatmatching, familiarize yourself with your DJ equipment. Most setups will include:

  • Decks or Turntables: To control and play tracks.
  • Mixer: To blend and adjust audio signals.
  • Pitch Fader: To adjust the tempo of each track.
  • Cue Buttons: To set and return to specific points in a track.
  • Headphones: For pre-listening and cueing tracks.

.


Step 2: Learn Track Structure

Understanding the structure of music is crucial for successful beatmatching. Most tracks follow a 4/4 time signature, meaning beats are grouped in sets of four.

What to Focus On:

  • Bars and Phrases: Tracks are typically divided into 8-bar or 16-bar phrases. Identifying these helps with timing transitions.
  • Downbeats and Kicks: Listen for the prominent kick drum that marks the start of each beat.

Step 3: Match Tempos

To match tempos:

  1. Play the first track on one deck.
  2. Load the second track on the other deck.
  3. Adjust the pitch fader of the second track to match the tempo of the first.
  4. Use the BPM display (if available) as a guide but rely on your ears for precision.

Tip for Practicing: Start with tracks that have similar BPMs before moving on to larger tempo differences.


Step 4: Align the Beats

Once the tempos are matched, focus on syncing the beats:

  1. Use the cue button to pause and rewind the second track to its starting point.
  2. Play the first track and listen to the beat.
  3. While monitoring the second track in your headphones, release it at the right moment to align its beat with the first track.
  4. Use the jog wheel or pitch bend buttons to make fine adjustments if the beats drift.

Step 5: Practice Blending

When the beats are aligned, start blending the two tracks using the mixer:

  • Gradually bring up the volume of the second track while fading out the first.
  • Adjust the EQs (low, mid, high) to ensure a smooth transition without clashing frequencies.

Common Challenges and How to Overcome Them

  • Tracks Drifting Apart: This happens when tempos aren’t perfectly matched. Continuously monitor and make small adjustments using the jog wheel.
  • Difficulty Hearing the Cue Track: Invest in quality headphones and monitor your cue track at a comfortable volume.
  • Transition Timing Issues: Practice identifying the right moments to start and blend tracks, focusing on bars and phrases.

Tips for Effective Practice

  1. Start Simple: Practice with tracks that have a steady beat and similar BPM.
  2. Use Headphones Wisely: Always cue and pre-listen to the next track before transitioning.
  3. Record Your Mixes: Listening back helps identify areas for improvement.
  4. Practice Regularly: Dedicate time each day to refine your skills.

When to Use Auto-Sync

While manual beatmatching is a valuable skill, auto-sync can still be useful in certain scenarios:

  • When performing complex mixes that require more focus on EQs or effects.
  • During live performances where time is limited, and quick transitions are needed.

However, relying too heavily on auto-sync can hinder your growth as a DJ.


Take Your Beatmatching to the Next Level

Once you’ve mastered basic beatmatching, explore advanced techniques:

  • Double Drops: Sync two tracks so their drops hit simultaneously for a dramatic effect.
  • Harmonic Mixing: Match tracks in the same key to create smoother transitions.
  • Layering Beats: Blend percussive elements from one track with melodies from another.

Why Manual Beatmatching is a DJ Essential

While technology has changed the landscape of DJing, manual beatmatching remains a core skill that sets professionals apart. It gives you a deeper connection to your music and allows for creative, dynamic performances.

For more tips, guides, and DJ resources, visit mp4remix.com. Whether you’re a beginner or a seasoned DJ, mastering beatmatching will elevate your sets and make you a crowd favorite.


Conclusion: Practice Makes Perfect

Beatmatching is both a technical and creative skill that takes time to master. By practicing consistently, understanding your tracks, and refining your techniques, you’ll gain the confidence to mix seamlessly and keep the energy flowing on the dance floor.

The Art of Live Looping: How to Incorporate It into Your DJ Sets

How to Incorporate It into Your DJ Sets

In the world of DJing, standing out is key. One of the most creative ways to elevate your performances is through live looping. This technique not only adds a unique, improvisational touch to your sets but also allows you to engage your audience with dynamic and evolving soundscapes.

Whether you’re a beginner or an experienced DJ, understanding the art of live looping can open up new possibilities for your performances. In this article, we’ll explore what live looping is, why it’s a game-changer, and how to seamlessly incorporate it into your sets.


What Is Live Looping?

At its core, live looping involves recording a segment of audio in real-time and continuously playing it back as a loop. DJs and producers use this technique to layer sounds, create rhythms, and build complex arrangements on the fly.

Live looping can be done with:

  • Hardware loop stations (like the Boss RC series).
  • DJ controllers with loop functions.
  • Software tools such as Ableton Live, Serato, or Rekordbox.

Why Use Live Looping in Your DJ Sets?

  1. Create Unique Performances
    • Live looping adds an element of spontaneity, ensuring no two sets sound the same.
  2. Engage Your Audience
    • Watching a DJ create loops live adds a visual and interactive element to your performance.
  3. Blend Genres Seamlessly
    • Use loops to transition between different musical styles without losing energy.
  4. Experiment with Improvisation
    • Add fresh layers, vocal chops, or percussive elements to keep your sets dynamic.

Essential Tools for Live Looping

To master live looping, you’ll need the right tools. Here’s a breakdown of popular equipment and software:

  1. DJ Controllers with Loop Features
    • Modern controllers like the Pioneer DJ DDJ-1000 or Denon DJ Prime 4 have built-in loop pads and sampling capabilities.
  2. Loop Stations
    • Devices like the Boss RC-505 are perfect for hands-on control and multi-layered looping.
  3. DAWs with Looping Functions
    • Ableton Live is a favorite among DJs and producers for its intuitive looping interface. Pair it with a MIDI controller for maximum control.
  4. Performance Software
    • Programs like Serato DJ Pro and Rekordbox include loop and sampler features for live creativity.

How to Incorporate Live Looping in Your Sets

  1. Start with Simplicity
    • Begin by looping basic elements like drums, basslines, or melodies. Focus on keeping your loops tight and in sync with the track’s tempo.
  2. Layer Sounds Gradually
    • Build your loops step by step. For example:
      • Start with a kick drum.
      • Add a hi-hat or snare.
      • Layer in a melody or vocal chop.
  3. Experiment with Effects
    • Use filters, delays, and reverbs to add texture to your loops. This keeps them interesting and avoids repetition.
  4. Use Loops as Transitions
    • Record a loop from the outgoing track and use it as a bridge to transition smoothly into the next song.
  5. Combine Pre-Recorded and Live Loops
    • Mix pre-recorded loops with live ones to create a blend of polished and improvised sounds.

Tips for Successful Live Looping

  1. Practice Timing
    • Perfect timing is essential for clean loops. Use the quantization features on your gear to help.
  2. Plan Key Elements
    • Decide which parts of your set are best suited for live looping, such as breakdowns or extended transitions.
  3. Know Your Equipment
    • Familiarize yourself with your loop station, controller, or software. Practice until looping becomes second nature.
  4. Engage with the Crowd
    • Live looping is a performance art. Make eye contact and use gestures to connect with your audience while building loops.
  5. Don’t Overdo It
    • Avoid cluttering your mix with too many layers. Focus on clarity and coherence.

Top DJs Using Live Looping

Many renowned DJs and producers incorporate live looping into their sets:

  • Dubfire: Known for creating intricate techno loops.
  • Reggie Watts: Combines live looping with comedy and vocals.
  • Tim Exile: Uses custom hardware and software for live improvisation.

Why Live Looping Is Perfect for DJs

Incorporating live looping into your DJ sets allows you to break free from pre-recorded tracks and showcase your skills as a true artist. It’s a tool for storytelling, experimentation, and building a deeper connection with your audience.

For unique loops, remixes, and other DJ resources, visit mp4remix.com.


Conclusion: Mastering the Art of Live Looping

Live looping is more than a technical skill—it’s an art form that can transform your DJ sets into unforgettable performances. With the right tools, practice, and creativity, you can captivate audiences and set yourself apart in the competitive world of DJing.